

How To Clean Off Grout Haze
How to Grout Tile: Grouting Tips and Techniques
Finish your new tile project with a professional quality grout job.
![]() Time
Time
A full day
![]() Complexity
Complexity
Beginner
![]() Cost
Cost
$51–100
Introduction
Master these simple professional grouting skills for durable, good-looking grout lines and a more attractive tiling job.
Tools Required
Materials Required
- Caulk
- Grout
- Masking tape
Project step-by-step (9)
Step 1
Prep work: Start with clean joints
Clean the joints
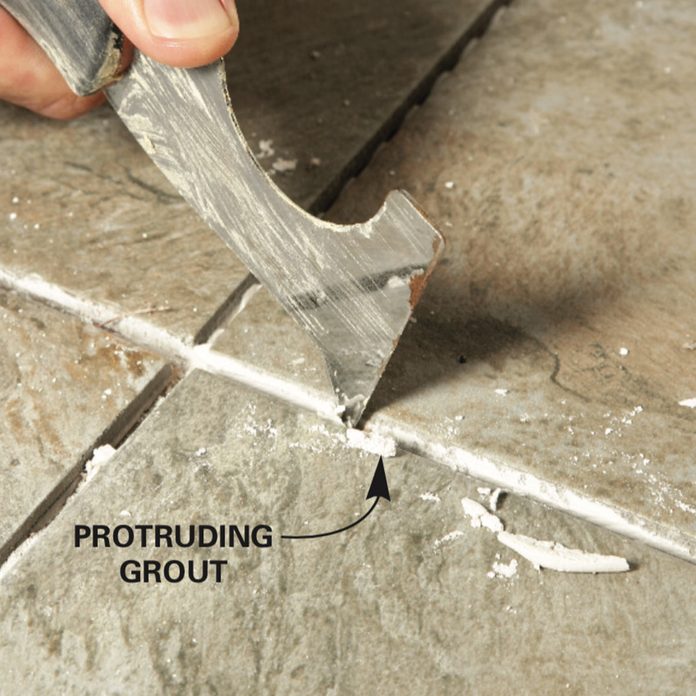
Vacuum the grout lines, then scrape any protruding grout using a stiff putty knife and vacuum again. Don't scrape too hard or you may chip the tile glazing on your how to grout tile project.
Apply tape to trim tiles

Photo 2: Tape off edges and trim tiles To paraphrase Rodney Dangerfield, grout gets no respect. Grout can ruin an otherwise great tile job. And yet how to grout tile and proper grouting technique are often treated as an afterthought, like the final few half-hearted steps of a tired runner stumbling over the finish line. Grout deserves better. Your tile deserves better.
The keys to a professional-quality grout job aren't secrets shrouded in mystery. On these pages, we'll show you some tips and techniques on how to grout tile so you're job goes more smoothly and give your tile a professional-grade finished look.
Start by vacuuming out all that remodeling dust, debris and any chips of dried thin-set from grout joints (Photo 1). If there are high spots where thin-set has oozed out and dried, use a sturdy-edged tool to scrape it out and then vacuum again, including the tile surfaces. The last thing you want is to push all that muck back into the joint as you are floating your grout in.
Tip: Tape Off the Tile Before Grouting
For easier cleanup, tape off painted walls to protect them from grout. Also tape off trim or inset tiles that feature imprinted patterns with crevices (Photo 9).
How to Repair Grout That's Cracking
Step 2
Mix the grout by hand
Mix the grout until it's powder-free
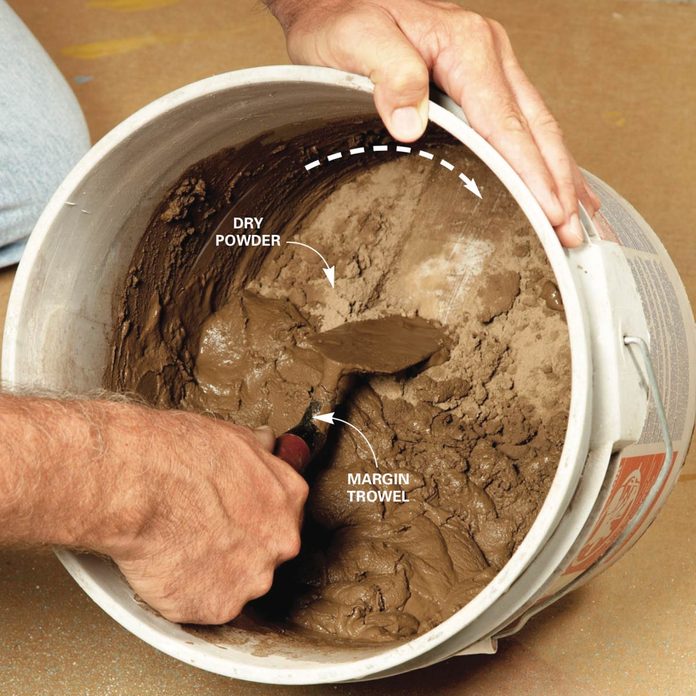
Mix the grout with a margin trowel until all the powder is dissolved. Roll the bucket frequently while mixing. Scrape the bottom to make sure all the grout is mixed. Pour some grout out of the bag into a mixing bucket. Pour water in a little at a time and start mixing by hand using a margin trowel (See "A Tiler's Best Friend" below). Tip the bucket toward you and roll it in a "cement mixer" style as you mix (Photo 3). Be sure to scrape any dry, unmixed grout from the bottom of the bucket with your margin trowel. Keep mixing until all the powder has been absorbed and it has the consistency of peanut butter. When you're getting close, dribble in water from a sponge. It only takes a little too much to create soup. And don't mix grout with a drill and mixing paddle. This method churns the grout and introduces air into the mix. That weakens the cured strength and causes a type of discoloration called "shading." Besides, we're trying to mix grout here, not make soufflé.
Let the grout "slake"
When your grout has reached peanut butter status, stop! Go and make a sandwich, take out the trash, whatever. Let the grout slake (rest) for about 10 minutes. This allows the chemicals in the grout to work their magic. Skipping this step may result in weaker, crack-prone joints. After slaking, the grout will feel a bit stiffer, but don't add more water. Remix the grout by hand again to loosen it up to get ready on this how to grout tile excursion.
A Tiler's Best Friend

Buy yourself a margin trowel for 10 bucks. You'll use it for mixing grout and thin-set, scraping out joints, cleaning buckets and tools, spreading mayonnaise, flipping pancakes....
As Thick as What?

Mix your grout to the consistency of creamy peanut butter.
Our Best Grouting Tips
Sign Up For Our Newsletter
Complete DIY projects like a pro! Sign up for our newsletter!
Do It Right, Do It Yourself!
![]()
Step 3
Load the grout float
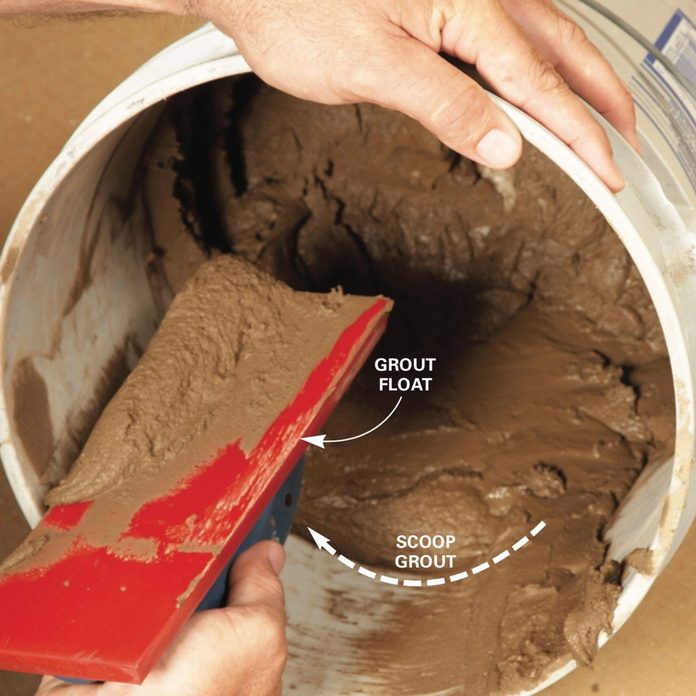
Tip the bucket toward you. Drag some grout "up the slope," then scoop it onto the float. You're now ready to grout. Tip the bucket toward you (like you did when mixing) and "drag" some grout with your float up the side of the bucket toward you to start this how to grout tile project. This pulls a "working batch" closer to you and makes it easier to scrape up a decent amount of grout onto your float. Push the float tight against the side of the bucket and scrape off a dollop of grout (Photo 4). Any excess that falls off will only fall into the bucket and not off the edge and onto the floor.
Video: Removing Tile Grout
Simplify ceramic tile grout removal by using a carbide-grit blade in a reciprocating saw or an oscillating tool. Both speed up this tough, tedious chore.
ⓘ
The Family Handyman
Step 4
Load the joints
Spread the grout

Smear the grout diagonally across the tile to force it deep into the joints and prevent it from being sucked back out as your float slides along. Always grout the walls first for this how to grout tile project, and after they're finished, the floor. That'll keep you from messing up a finished floor. Apply the grout diagonally across the tile joints to squish the grout into the joints (Photo 5). Use whichever side or corner of the float is necessary to fully compress grout into the entire joint. On vertical surfaces, apply grout upward. That way you won't drop so much on the floor.
How to Whiten Grimy Grout
Step 5
Clean off excess grout
Squeegee off the excess

Remove the bulk of the grout by wiping in a serpentine motion. This helps evenly distribute the grout and prevents the grout float edge from digging into grout lines. After you've filled all the joints, make your first "cleanup" passes with the float. Your goal is merely to get as much excess grout as possible off the face of the tile in this part of the how to grout tile project. Hold the float at a sharp angle to the tile and scrape excess grout from the surface. Use a serpentine motion to make it faster and easier (Photo 6).
How to Grout Tile
Step 6
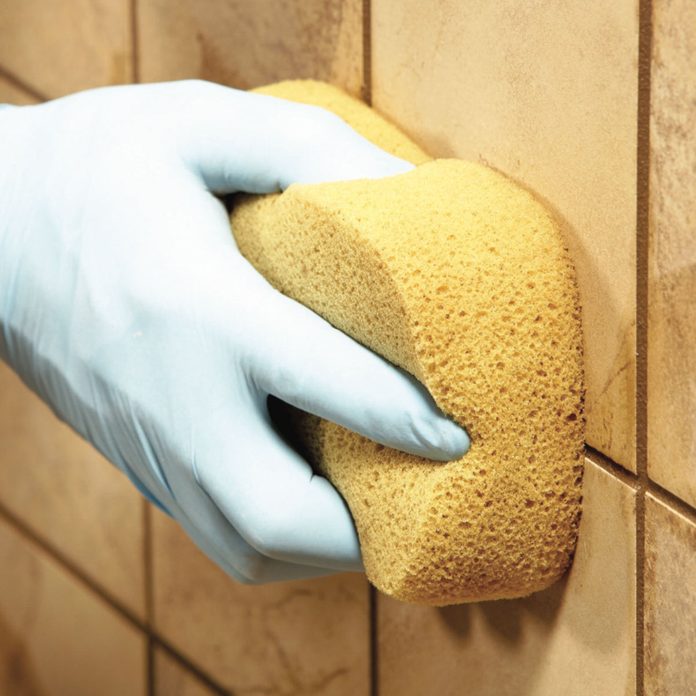
Sponge the surface
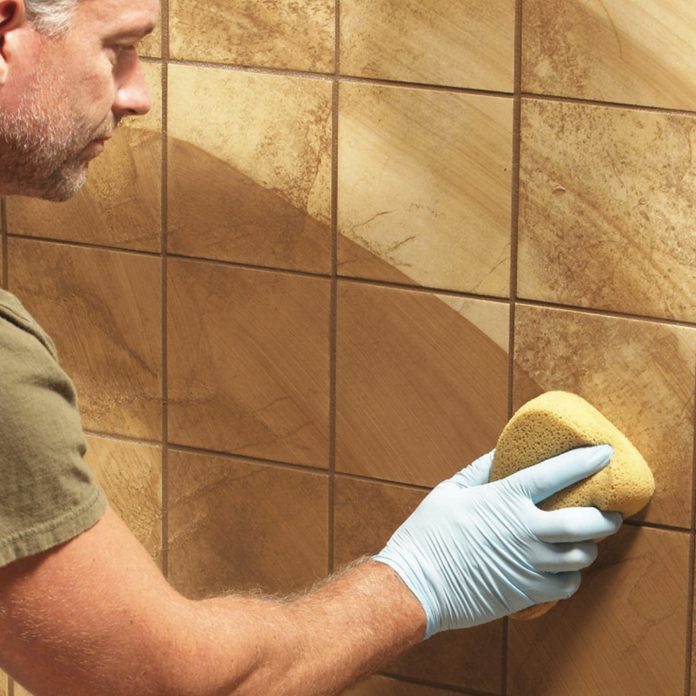
Sweep a damp (not wet!) sponge diagonally across the tile. Rinse your sponge often and repeat until you're left with a thin haze. Once the grout has started to harden (20 to 30 minutes), begin sponging (Photo 7). Don't use just any sponge, especially one from the kitchen; choose a "hydrophilic" (water-loving) sponge. They're sold near the tile supplies. Make sure it's damp, not wet, and sweep diagonally across the face of the tile and wipe the grout off the tile surface. On your first few passes, the grout will smear all over the tile and look like a mess — that's OK. Just rinse out your sponge often in a bucket of clean water (never in the sink) and keep wiping until most of the smeared-on grout is gone in this how to grout tile project.
Grouting Tile Floors: Porous and Uneven Tiles
Step 7
Tool the grout lines
Depress the sponge with your index finger and smooth out high or uneven grout lines. Don't push too hard. Your goal of this how to grout tile project is grout joints all the same shape and depth. When the surface has been cleaned, begin 'tooling' (smoothing and leveling) the grout lines with the sponge. Hold the sponge in your palm and, gently pressing down with your index finger, run the sponge over any grout joints that look too high or uneven (Photo 8). The goal of this how to grout tile project is consistent, even-depth grout joints. Don't push too hard; let the sponge do the work.
Tips for Removing Grout
Step 8
Towel off the haze
Buff out the haze
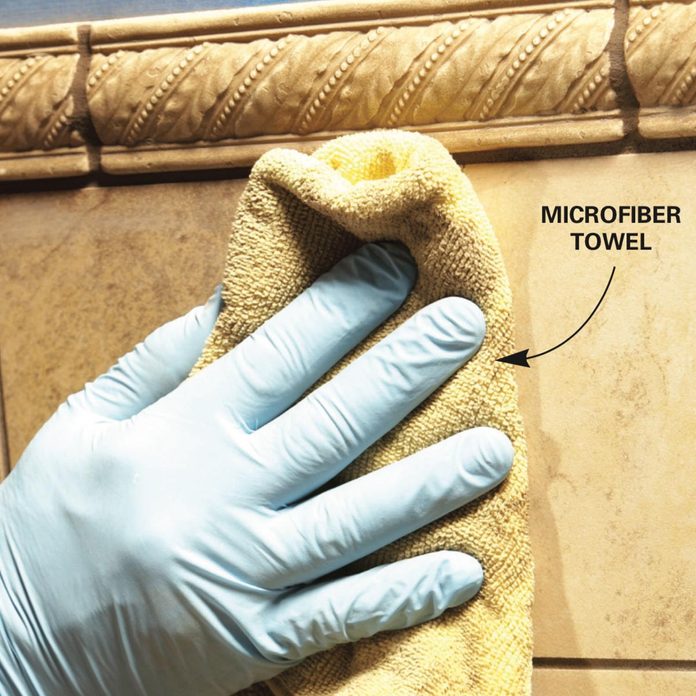
After the grout film has dried, polish away the haze with a cotton towel or, better yet, a microfiber towel. After all the joints have been dressed, step away for about a half hour to let the surface dry and form a haze. Then wipe away the haze with a towel. Regular towels work, but microfiber towels are the hot ticket for how to grout tile. With more fibers, they remove grout haze much quicker and cleaner than a regular towel.
Tip: Keep Some Grout for Repairs

It's a good idea to hold on to a small quantity of unused grout for future touch-ups as you discover how to grout tile. Grout will easily absorb ambient moisture, so store it in an airtight container such as a resealable plastic bag or a canning jar.
How to Remove Grout Haze From Stone Tile
Step 9
Caulk all inside corners
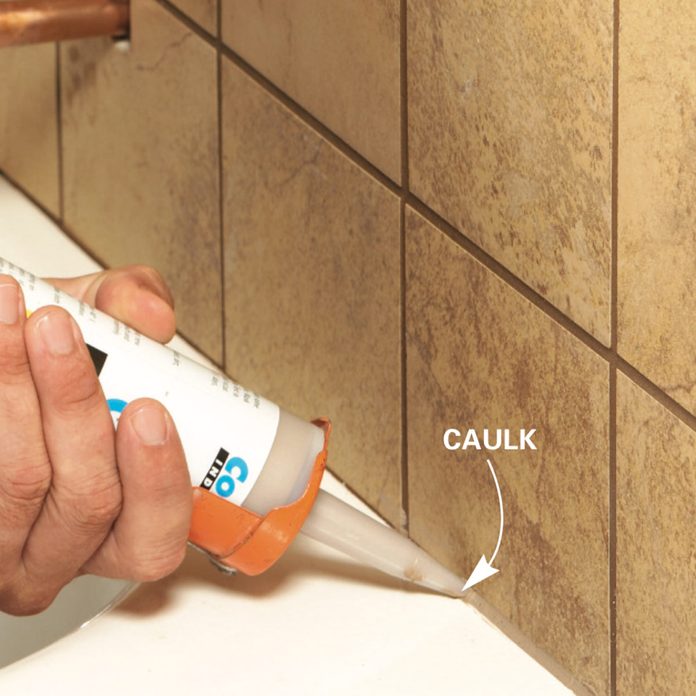
As you learn how to grout tile, don't grout inside corners. Use a grouting caulk on inside corners after grouting and cleaning. Don't overfill the void; you'll just make it harder to tool and clean. As you learn how to grout tile, don't grout inside corners. Inside corners that are grouted will always crack over time. Choose a matching color caulk designed to coordinate with the grout you've used. It's sold in matching colors near the grout.
What is Grout? Sanded vs Unsanded Grout
Sanded grout is stronger than unsanded grout and resists shrinkage and cracking better. As a rule of thumb, sanded grout should be used in joints larger than 1/8 in. Realistically, as long as you can force the grout into the joint, use sanded grout. But on soft stone tiles like polished limestone or marble, use only unsanded grout or you'll scratch the surface.
Matching Grout Colors and Caulk Colors
How To Clean Off Grout Haze
Source: https://www.familyhandyman.com/project/grouting-tips-and-techniques/
Posted by: villegasunely1936.blogspot.com
0 Response to "How To Clean Off Grout Haze"
Post a Comment